Best Home Made Organic Fertilizers
By Parvez Akhtar Pasha | Mar 20, 2025
Natural fertilizers are a budget-friendly and eco-friendly way to improve your soil and help plants grow strong. You can simply make natural fertilizers at home using organic waste from your kitchen (like vegetable scraps) and garden.
These compost and fertilizers are good for your plants, and provide important nutrients to plants without damaging the environment.
In this article, I'll show you how to make natural fertilizers with easy steps, charts, and tables for better understanding.
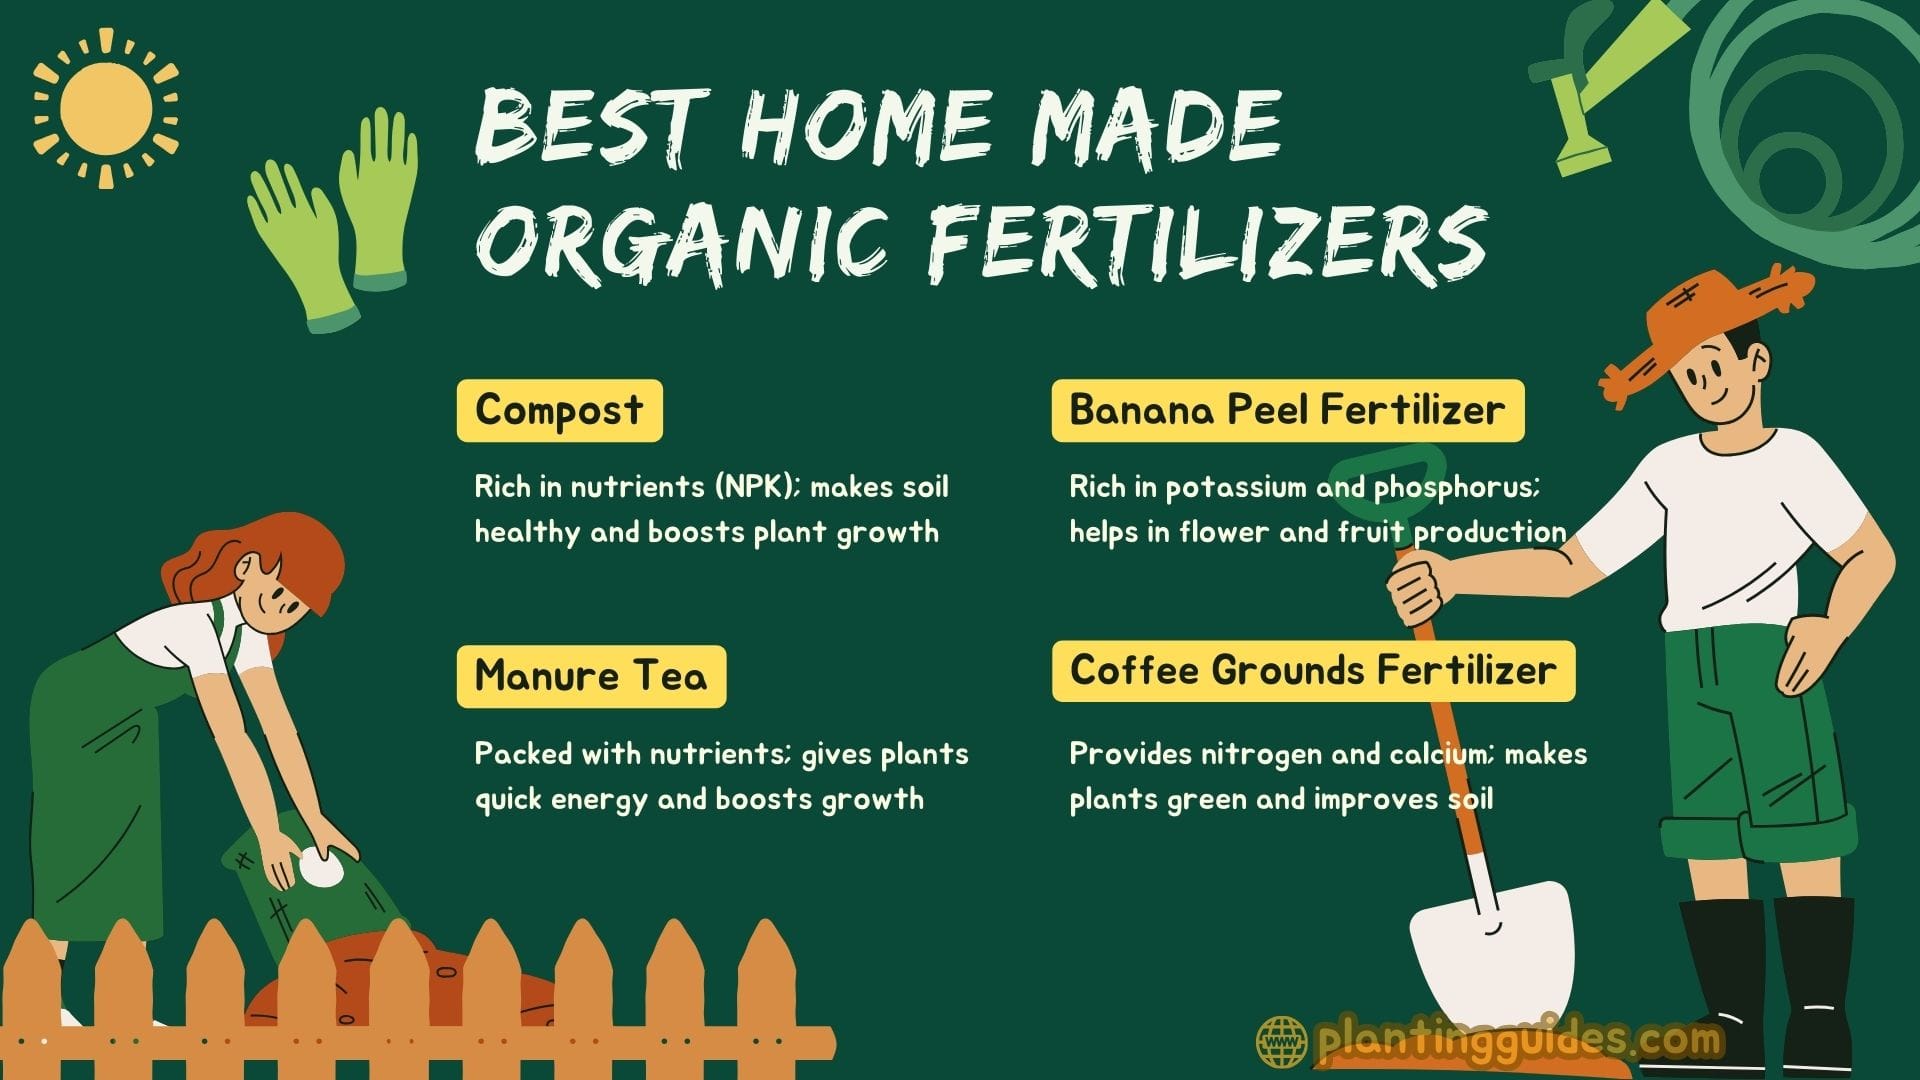
Some Natural Fertilizer Methods
Have a look at the table of some natural fertilizers that you can easily make at home. It includes the key ingredients, preparation time, main nutrients, and the types of plants they are best suited for.
| Fertilizer Type | Key Ingredient(s) | Preparation Time | Main Nutrients | Best for Plants |
|---|---|---|---|---|
| Compost | Kitchen & garden waste | 2-3 months | Nitrogen, Phosphorus, Potassium | Vegetables, flowers, fruit trees |
| Banana Peel Fertilizer | Banana peels, Water | 24-48 hours | Potassium, Phosphorus, Calcium | Flowering plants, fruit trees, Indoor Plants |
| Eggshell Fertilizer | Crushed eggshells | Immediate | Calcium | Tomatoes, peppers, leafy greens |
| Epsom Salt Fertilizer | Epsom salt, Water | Immediate | Magnesium, Sulfur | Peppers, tomatoes, roses |
| Coffee Grounds Fertilizer | Used coffee grounds, Water | 24-48 hours | Nitrogen | Lawns, leafy vegetables, Indoor Plants |
| Manure Tea | Aged animal manure, Water | 1-2 days | Nitrogen, Phosphorus, Potassium | Fruit trees, vegetables, flowers |
I only use organic fertilizers in my garden, even for fruit trees and vegetables. I don't prefer using chemical fertilizers because they are harmful to the environment and our health too. Everything I share in this article comes from my own experience. I’ve tested it all myself over the years and sharing my knowledge so you can benefit too.
All organic fertilizers like compost, banana peel fertilizer, eggshell fertilizer, and manure tea are safe and beneficial for almost all plants.
I have mentioned specific plants for each organic fertilizer in the table to highlight which plants benefit the most from certain nutrients.
Compost
Composting is a natural process where things like fruit peels, vegetable scraps, dry leaves, and other organic waste break down over time. This turns into rich, healthy soil that helps plants grow better.
Required Items
- Vegetable scraps
- Fruit peels
- Coffee grounds
- Grass clippings
- Dry leaves
- Eggshells
Steps to Make Compost easily at home
- Choose a compost bin or a designated compost pile.
- Add a mix of green (nitrogen-rich) materials like food scraps and grass clippings and brown (carbon-rich) materials like dry leaves and cardboard.
- Keep the pile slightly moist but not too wet.
- Turn the pile regularly to aerate and speed up decomposition.
- After a few months, the compost will turn into dark, rich soil that can be used as fertilizer.
Nutrients in Compost
Compost is full of important nutrients that help plants grow. Each nutrient has a special job, like making leaves stronger or helping roots grow.
The below table shows what each nutrient does and where it comes from in compost.
| Nutrient | Role in Plant Growth | Source in Compost |
|---|---|---|
| Nitrogen (N) | Leaf and stem growth | Vegetable scraps, grass clippings |
| Phosphorus (P) | Root development and flowering | Fruit peels, eggshells |
| Potassium (K) | Overall plant health | Banana peels, wood ash |
| Calcium (Ca) | Strong cell walls | Eggshells |
| Magnesium (Mg) | Photosynthesis | Coffee grounds |
There are also some other nutrients in compost, like Iron (Fe), which keeps plants green, Zinc (Zn), which boosts growth, Sulfur (S), which improves smell and taste, Copper (Cu), which protects from infections, and Manganese (Mn), which helps plants make food from sunlight.
Best Time to Use Compost at Each Growth Stage of a Plant
Using compost at the right time helps plants grow better and stay healthy.
Here's a simple guide on which compost to use and when to use it at each stage of plant growth.
| Plant Growth Stage | Compost Type to Use | Purpose of Compost Use | Frequency |
|---|---|---|---|
| Soil Preparation (Before Sowing/Planting) | Mix compost with soil 2-3 weeks before planting | Improves soil structure, fertility, and moisture retention | 2-3 weeks before planting |
| Seed Sowing/Germination | No compost directly on seeds | Seeds are sensitive, compost may burn them | Not recommended |
| Seedling Stage (After Germination) | Sprinkle a thin layer of compost on top | Provides nutrients to young plants | Once after seedlings appear |
| Transplanting Stage (Shifting to bigger pots or ground) | Add compost to root zone or planting hole during transplant | Reduces transplant shock, boosts root growth | During transplanting |
| Vegetative Growth Stage (Leaf and Stem Growth) | Use compost tea or a thin compost layer on top | Provides nutrients for strong foliage growth | Every 2-3 weeks |
| Flowering Stage | Add compost on top or use compost tea | Boosts flower production | Every 2 weeks |
| Fruiting Stage | Add compost on top or use compost tea | Helps plants grow healthy fruits | Every 2 weeks |
Using compost and natural fertilizers instead of chemical fertilizers is better for the environment.
Banana Peel Fertilizer
Banana peels are rich in potassium and phosphorus, which help plants grow strong roots and produce flowers and fruits.
Required Items
- Banana peels
- Water
Steps to Make Banana Peel Fertilizer
- Chop banana peels into small pieces.
- Soak them in water for 24 hours.
- Use the water to water your plants.
- You can also bury the leftover peels in the soil to release nutrients slowly.
Mix banana peel water with compost tea or add to your compost pile for an extra nutrient boost.
Nutrients in Banana Peel Fertilizer
Banana peels are full of important nutrients that help plants grow strong and healthy.
The table below shows what nutrients are in banana peels, and how they help plants.
| Nutrient | Percentage in Banana Peel | Role in Plant Growth |
|---|---|---|
| Potassium (K) | 42% | Essential for flowering, fruiting, and disease resistance. |
| Phosphorus (P) | 3.25% | Supports root growth and seed formation. |
| Calcium (Ca) | 19.2% | Strengthens cell walls and improves soil structure. |
| Magnesium (Mg) | 7.5% | Helps in photosynthesis and promotes green leaf growth. |
Also, some nutrients like Sulfur (S), Iron (Fe), Manganese (Mn), and Zinc (Zn) are present in banana peel fertilizer in smaller amounts. These nutrients work together to improve plant health and soil quality.
Best Time to Use Banana Peel Fertilizer at Each Growth Stage of a Plant
Using banana peel fertilizers at the right time during a plant’s growth cycle helps get maximum benefits.
The table below shows how and when to use banana peel fertilizer at each stage of a plant's growth, from soil preparation to fruiting.
| Plant Growth Stage | How to Use Banana Peel Fertilizer | Purpose of Use | Frequency |
|---|---|---|---|
| Soil Preparation (Before Sowing/Planting) | Mix chopped banana peels into the soil or compost pile | Enriches soil with potassium and phosphorus | 2-3 weeks before planting |
| Seed Sowing/Germination | Soak banana peels in water and use the liquid as a light soil drench | Boosts seedling strength without burning them | Once during sowing |
| Seedling Stage (After Germination) | Bury small pieces of banana peel around seedlings | Provides slow-release nutrients for root development | Once after seedlings appear |
| Transplanting Stage (Shifting to bigger pots or ground) | Add banana peel pieces in the planting hole | Reduces transplant shock and promotes root growth | During transplanting |
| Vegetative Growth Stage (Leaf and Stem Growth) | Use banana peel water or composted peels as a liquid fertilizer | Boosts nitrogen and potassium for healthy foliage | Every 2-3 weeks |
| Flowering Stage | Bury dried or crushed banana peels around the base of the plant | Enhances flower production and bloom quality | Every 2 weeks |
| Fruiting Stage | Apply banana peel tea or banana compost around the plant base | Supports fruit formation and improves taste | Every 2 weeks |
Banana peel fertilizer is an easy and natural way to help plants grow well at every stage.
Eggshells Fertilizer
Eggshells have a lot of calcium, which helps plants grow strong and healthy by making their cell walls stronger.
Required Items
Crushed eggshells
Steps to Make Eggshells Fertilizer
- Wash and dry the eggshells.
- Crush them into tiny pieces.
- Spread the crushed shells around your plants.
Nutrients in Eggshell Fertilizer
Eggshells are a natural way to give plants important nutrients.
The table below shows the key nutrients found in eggshell fertilizer and their roles in plant development.
| Nutrient | Percentage in Eggshell Fertilizer | Role in Plant Growth |
|---|---|---|
| Calcium (Ca) | 90-95% | Strengthens cell walls, prevents rot. |
| Magnesium (Mg) | 0.5-1% | Supports photosynthesis. |
| Phosphorus (P) | 0.4-0.9% | Helps roots grow and flowers bloom. |
| Potassium (K) | 0.3-0.4% | Helps plants stay healthy and fight diseases. |
Eggshells also have small amounts of Iron (Fe), Zinc (Zn), Copper (Cu), and Manganese (Mn), which help plants stay green, grow properly, and stay strong.
Best Time to Use Eggshell Fertilizer at Each Growth Stage of a Plant
Eggshells are a great natural way to add calcium to the soil and help plants grow strong.
The table below shows how and when to use them at different stages of plant growth for the best results.
| Plant Growth Stage | How to Use Eggshells | Purpose of Use | Frequency |
|---|---|---|---|
| Soil Preparation (Before Sowing/Planting) | Crush and mix powdered eggshells with soil | Improves soil structure, adds calcium, and balances pH | 2-3 weeks before planting |
| Seed Sowing/Germination | No direct application on seeds | May slow down germination due to high calcium content | Not recommended |
| Seedling Stage (After Germination) | Sprinkle finely crushed eggshells around seedlings | Provides slow-release calcium for root development | Once after seedlings appear |
| Transplanting Stage (Shifting to bigger pots or ground) | Add crushed eggshells to the planting hole | Reduces transplant shock and strengthens roots | During transplanting |
| Vegetative Growth Stage (Leaf and Stem Growth) | Spread crushed eggshells around plants | Prevents calcium deficiency and strengthens cell walls | Every 2-3 weeks |
| Flowering Stage | Add powdered eggshells around the base | Boosts flower production and prevents blossom end rot | Every 2 weeks |
| Fruiting Stage | Add crushed eggshells around the plant | Prevents calcium deficiency and helps in fruit development | Every 2 weeks |
Add crushed eggshells to your compost pile. They add calcium and help break down waste faster.
The smaller you crush the eggshells, the faster they break down and release nutrients into the compost.
Epsom Salt Fertilizer – Magnesium for Greener Leaves
Epsom salt is a simple and powerful natural fertilizer. This fertilizer has two important nutrients – magnesium and sulfur. It makes plants grow faster, looks greener, and helps produce more flowers and fruits.
Required Items
- Epsom salt (Magnesium sulfate)
- 1 liter of water
- A spray bottle or watering can
- A mixing spoon
Steps to Make Epsom Salt Fertilizer
- Take 1 tablespoon of Epsom salt.
- Dissolve it in 1 liter of water.
- Mix it well until the salt is completely dissolved.
- Pour the solution into a spray bottle or watering can. Now, it's ready to use.
Nutrients in Epsom Salt Fertilizer
The table below shows the percentage of nutrients present in Epsom salt and their role in plant growth.
| Nutrient | Percentage in Epsom Salt Fertilizer | Role in Plant Growth |
|---|---|---|
| Magnesium (Mg) | 10% | Helps in photosynthesis, makes leaves greener, and improves nutrient absorption. |
| Sulfur (S) | 13% | Improves plant protein and enzyme production, strengthens plant roots. |
Epsom salt fertilizer is best for acidic soil, sandy soil, and potted plants.
Epsom Salt Fertilizer – Best Time to Use at Each Growth Stage of a Plant
Epsom salt, also known as Magnesium Sulfate, is one of the best natural fertilizers for plants.
The table below shows how and when to use Epsom salt fertilizer at each stage of a plant's growth for better results.
| Plant Growth Stage | Epsom Salt Application Method | Purpose of Use | Frequency |
|---|---|---|---|
| Soil Preparation (Before Sowing/Planting) | Mix 1 cup of Epsom salt per 100 sq. ft. of soil | Improves soil magnesium levels and boosts seed germination | 1-2 weeks before planting |
| Seed Sowing/Germination | Not recommended | Seeds are sensitive to salt content | Not recommended |
| Seedling Stage (After Germination) | Mix 1 tbsp of Epsom salt in 1 gallon of water and spray on leaves | Strengthens root development and boosts growth | Once after seedlings appear |
| Transplanting Stage | Add 1 tbsp of Epsom salt to the planting hole | Reduces transplant shock and improves root health | During transplanting |
| Vegetative Growth Stage | Mix 2 tbsp of Epsom salt in 1 gallon of water and spray on foliage | Enhances chlorophyll production and green foliage | Every 2-3 weeks |
| Flowering Stage | Mix 1 tbsp of Epsom salt in 1 gallon of water and water the base | Boosts flower production | Every 2 weeks |
| Fruiting Stage | Sprinkle 1 tbsp of Epsom salt around the base and water thoroughly | Improves fruit quality and and increases the harvest. | Every 2 weeks |
Regular use of Epsom salt as a natural fertilizer can help prevent yellow leaves, slow growth, and poor fruit production, especially in plants like tomatoes, peppers, and flowers.
For best results, use this fertilizer in the morning or evening to avoid burning the leaves.
Used Coffee Grounds – Boosts Nitrogen
Used coffee grounds are like "morning coffee" for plants, full of energy and nutrients. They have lots of nitrogen that helps plants grow green and happy.
So, please don't throw them away. You can mix them with soil to improve them, keep them moist, and even keep pests away.
Required Items
- Used coffee grounds (dried or fresh)
- A small container or bowl for storage
- Water (for making liquid fertilizer)
- A strainer (if making coffee ground tea)
Note: Never ever try to use unused coffee grounds as it is highly acidic.
Steps Coffee Grounds Fertilizer
You can sprinkle them on the soil or make a liquid fertilizer with them.
Direct Soil Application
- Collect the used coffee grounds after making coffee.
- Dry them well so they don’t get moldy.
- Sprinkle them around your plants.
- Gently mix with the soil to help plants absorb nutrients.
Make a liquid fertilizer
- Take 1 cup of used coffee grounds and put them in a container.
- Add 5 cups of water and let it rest for 24 hours.
- Stir it now and then to release the nutrients.
- Separate the water and use it to water your plants for a nitrogen boost.
Nutrients in Coffee Grounds Fertilizer
The table below shows the main nutrients found in coffee grounds, their percentages, and how they help plants grow.
| Nutrient | Percentage | Role in Plant Growth |
|---|---|---|
| Nitrogen (N) | 2% | Promotes leafy growth and greenery |
| Phosphorus (P) | 0.3% | Strengthens roots and stems |
| Potassium (K) | 0.6% | Boosts flower and fruit production |
Coffee grounds also contain a small amount of magnesium and calcium, which improve soil health and keep the pH level balanced.
Best Time to Coffee Grounds Fertilizer at Each Growth Stage of a Plant
It's important to use coffee grounds at the right time and in the right way for the best result.
The table below provides a clear guide on how to use coffee grounds for each stage of plant growth.
| Plant Growth Stage | How to Use Coffee Grounds | Purpose of Use | Frequency |
|---|---|---|---|
| Soil Preparation (Before Sowing/Planting) | Mix directly with soil | Improves soil structure and boosts nitrogen levels | 2-3 weeks before planting |
| Seed Sowing/Germination | Avoid using directly on seeds | Coffee grounds can Slow down seed germination | Not recommended |
| Seedling Stage (After Germination) | Mix water with coffee ground liquid fertilizer and use it on the seedlings. | Gives young plants a small nitrogen boost. | Once after seedlings appear |
| Transplanting Stage (Shifting to bigger pots or ground) | Sprinkle around the root zone or use as liquid fertilizer | Reduces transplant shock and promotes root growth | During transplanting |
| Vegetative Growth Stage (Leaf and Stem Growth) | Sprinkle around plants or use coffee ground liquid fertilizer | Provides nitrogen for healthy foliage growth | Every 2-3 weeks |
| Flowering Stage | Use liquid coffee grounds fertilizer to water the plants | Boosts flower production and improves soil acidity | Every 2 weeks |
| Fruiting Stage | Lightly sprinkle around the base or apply liquid fertilizer | Helps in healthy fruit development | Every 2 weeks |
You can mix used coffee grounds with dry leaves or straw and spread them around plants to keep the soil moist and stop weeds from growing, use it every 2-3 weeks in summer.
You can also mix coffee grounds with compost and organic waste to boost compost nutrients and help it break down faster.
Manure Tea
Manure tea is a natural liquid fertilizer made by soaking animal manure in water. This helps release nutrients into the water, which can then be used to feed plants to boost root growth, make plants stronger, and improve soil health.
Required Items
- Well-aged manure (from cows, horses, or chickens)
- Large bucket
- Water
Steps to Make Manure Tea
- Fill the bucket with water and add the manure in a ratio of 1:5 (one part manure to five parts water).
- Mix it well and let it rest for 1-2 days so the nutrients can spread into the water.
- Filter the liquid and add more water if needed.
- Apply the tea directly to the soil around the plants.
Nutrients in Manure Tea
These are some key nutrients found in manure tea along with their percentage range, and how they benefit plant growth.
| Nutrient | Percentage | Role in Plant Growth |
|---|---|---|
| Nitrogen (N) | 1.5% - 2.5% | Helps plants grow more leaves and look greener. |
| Phosphorus (P) | 1% - 1.5% | Strengthens roots and flowers |
| Potassium (K) | 1.5% - 3% | Increases fruit and flower production |
| Calcium & Magnesium | 0.5% - 1% | Improves soil health and prevents diseases |
Manure tea also contains small amounts of essential micronutrients like iron, zinc, copper, and manganese, which help boost plant immunity and overall health.
Manure Tea – Best Time to Use at Each Growth Stage of a Plant
Manure tea can be used in different ways to improve plant growth, strengthen roots, and keep pests away.
Below is a simple guide on how to use manure tea effectively.
| Plant Growth Stage | Manure Tea Application Method | Purpose of Use | Frequency |
|---|---|---|---|
| Soil Preparation (Before Sowing/Planting) | Mix manure tea with soil or water the soil with it | Enriches soil with nutrients and improves fertility | 2-3 weeks before planting |
| Seed Sowing/Germination | Dilute manure tea heavily and water the soil (not directly on seeds) | Provides mild nutrients without burning seeds | Once before sowing |
| Seedling Stage (After Germination) | Lightly spray diluted manure tea on soil around seedlings | Boosts early root development and strengthens young plants | Once every 2 weeks |
| Transplanting Stage (Shifting to bigger pots or ground) | Soak plant roots in diluted manure tea before transplanting | Reduces transplant shock and enhances root growth | During transplanting |
| Vegetative Growth Stage (Leaf and Stem Growth) | Foliar spray or water the soil with diluted manure tea | Helps plants grow thick and healthy leaves. | Every 2 weeks |
| Flowering Stage | Water the base with manure tea or lightly spray leaves | Supports flower production and nutrient absorption | Every 2 weeks |
| Fruiting Stage | Water the base with manure tea | Enhances fruit development and increases the harvest | Every 2 weeks |
Manure tea is a natural liquid fertilizer that provides plants with important nutrients at every stage of growth.
Use diluted manure tea every two weeks during the growing, flowering, and fruiting stages. Avoid using it directly on seeds and young seedlings to prevent damage.
This is not just an article, this is a collection of my years of experience. Subscribe to this site to help me bring more content like this.